Raspberry Ice Cream is the perfect indulgence for hot summer days or any time you crave a sweet treat. This delightful dessert showcases the bright, tart flavor of fresh raspberries, blended into a rich and creamy ice cream base that will make your taste buds dance with joy. Trust me, whether you’re a seasoned ice cream maker or a novice in the kitchen, this recipe is as much about simplicity as it is about celebrating one of nature’s most joyful fruits.

I remember the first time I made raspberry ice cream at home—it was a warm afternoon, and the sun was shining brightly. I found myself with a basket of plump, fragrant raspberries and a craving for something refreshingly sweet. After a bit of experimentation, I created a recipe that not only satisfied my sweet tooth but also made my kitchen smell heavenly. Homemade raspberry ice cream is a luxurious treat that easily beats any store-bought version, and it’s surprisingly budget-friendly! So, grab some raspberries and let’s whip up a batch you’ll want to savor again and again.
Why You’ll Love This Recipe
- Simple & Quick: This delightful dessert takes only about 20 minutes of prep time, with just a little waiting involved for the chilling and churning.
- Irresistible Flavor: Each bite combines the tangy punch of raspberries with creamy richness, creating an unforgettable taste experience.
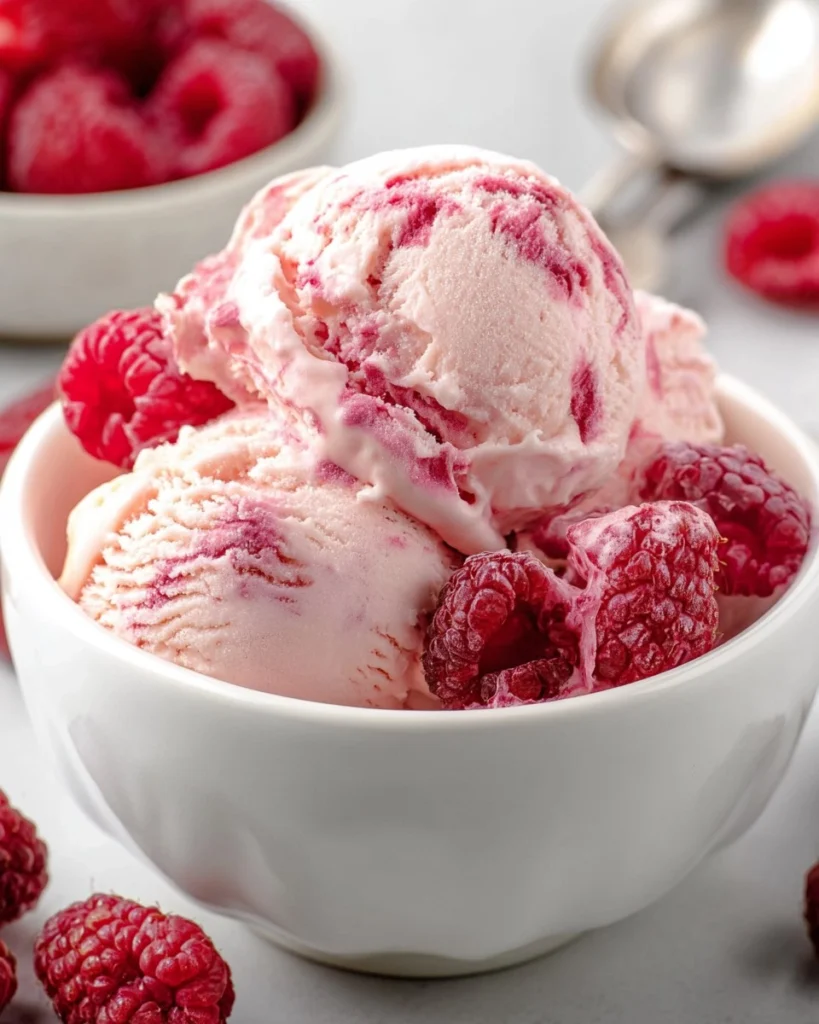
- Eye-Catching Appeal: The vibrant pink color and lovely swirls from raspberry preserves make it perfect for entertaining or impressing your family.
- Flexible Serving: Enjoy it on a hot day, as a party treat, or even as a breakfast splurge—why not?
- Diet-Friendly Options: Swap dairy for cashew or oat milk to make it friendly for dairy-free diets without losing taste.
Ingredients You’ll Need
- 12 ounces fresh or frozen raspberries: Using fresh or frozen raspberries adds that essential fruity flavor. No need to thaw the frozen kind before using.
- 3/4 cup granulated sugar: This will help create a deliciously sweet raspberry preserve; adjust according to your taste.
- 1 tablespoon lemon juice: This enhances the raspberry flavor, giving the ice cream a zestful kick.
- 1/2 teaspoon vanilla extract: Adds depth to the flavor; pure vanilla is always best for ice cream.
- 2 cups heavy cream: This is key to creating that rich, creamy texture; you’ll use it in two parts for best results.
- 1/2 cup granulated sugar (for the custard base): A second measure for the custard, ensuring it’s sweet enough.
- 4 large egg yolks: These provide a luscious, silky texture while enriching the flavor.
- 1/8 teaspoon salt: A pinch elevates all the flavors, balancing the sweetness.
- 1 teaspoon vanilla extract (for the custard): Again, pure vanilla enhances the overall flavor profile.
- 1/4 cup whole milk: Whole milk adds smoothness; consider cashew or oat milk for a non-dairy option.
How to Make Raspberry Ice Cream
- Prepare Your Equipment: Start by placing a small plate in the freezer; this will help you test the consistency of your raspberry preserves later on.
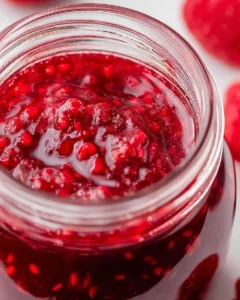
- Cook the Raspberries: In a 1-quart or larger saucepan, add the raspberries, 3/4 cup granulated sugar, and 1 tablespoon lemon juice. Stir frequently over medium-high heat until it reaches a full boil, then reduce to the lowest heat to keep it bubbling gently. Cook for about 8-10 minutes, stirring to prevent burning, until it thickens to a jam-like consistency. The longer you cook it, the more concentrated the flavor becomes! For testing, drop a spoonful onto your cold plate; if it holds its shape and wrinkles slightly when you push it, it’s ready to go.
- Flavor It: Once the raspberry mixture is ready, stir in 1/2 teaspoon vanilla extract. Transfer to a wire rack to cool while you prepare the ice cream base. If you’re preparing ahead, store it in a jar in the refrigerator for up to a week.
- Prepare the Ice Cream Base: In a medium saucepan over medium heat, combine 1 cup heavy cream, 1/2 cup granulated sugar, 4 large egg yolks, and 1/8 teaspoon salt. Stir gently and constantly until the mixture thickens and coats the back of a wooden spoon, reaching about 170°F (77°C)—this should take around 4-7 minutes.
- Cool and Flavor: Remove from the heat and mix in 1 teaspoon vanilla extract and 1/4 cup whole milk. Pour in the cooled raspberry preserves and the remaining 1 cup of heavy cream.
- Strain the Mixture: To ensure a super smooth ice cream, set a fine-mesh sieve over your mixing bowl and strain the mixture through it. This might seem like an extra step, but it really makes a difference in texture.
- Chill the Mixture: Let it cool to room temperature before covering it and refrigerating for at least 8 hours, or overnight for thorough chilling. (Though it’s good to know that as little as 3-4 hours can work if you’re in a hurry!)
- Churn the Ice Cream: Once chilled, pour the mixture into your pre-frozen ice cream maker bowl and churn according to the manufacturer’s instructions. It should resemble soft-serve ice cream as soon as it’s done.
- Freeze to Serve: Use a shallow, freezer-safe container to store it. Press a piece of plastic wrap directly onto the surface (to avoid freezer burn) and cover it with a lid. Store it in the back of the freezer for the best stability.
Storing & Reheating
To store your homemade raspberry ice cream, keep it in the freezer in an airtight container. It can last up to 2-3 months, but will taste best within two weeks for optimal creaminess. If you find it has frozen hard, simply let it sit at room temperature for a few minutes before scooping to refresh its texture.
Chef’s Helpful Tips
- Watch the heat: When making the custard, don’t let the mixture boil, as this can create eggy bits. Keep it gentle!
- Chill your tools: For best results, chill your ice cream maker bowl in advance. This helps in quicker freezing, which means creamier ice cream.
- Avoid ice crystals: Use a wide, shallow container for freezing your ice cream. This helps it freeze more evenly and reduces ice crystal formation.
- Taste as you go: Adjust sweetness levels in the raspberry mixture based on your preference, especially if you have tart raspberries.
- Make-ahead: The raspberry preserves can be made ahead of time, making the ice cream preparation a breeze on the day you plan to serve it.
Creating your own raspberry ice cream is not just a treat; it’s an experience filled with bursts of flavor and the joy of homemade goodness. With fresh ingredients and a little patience, you’ll find the process as rewarding as the result. Feel free to experiment with additional flavors or mix-ins, and don’t hesitate to share this delightful dessert with friends and family. I guarantee it will bring smiles all around!

Recipe FAQs
Can I use frozen raspberries for this recipe?
Absolutely! You can use frozen raspberries without thawing them first. They’ll cook down the same way fresh ones do, and you’ll still achieve that vibrant flavor.
How long will homemade raspberry ice cream last in the freezer?
While it’s best enjoyed within two weeks for the creamiest texture, homemade raspberry ice cream can last for up to 3 months in the freezer if stored properly in an airtight container.
What if my ice cream is too hard?
If your raspberry ice cream hardens too much after freezing, simply let it sit at room temperature for about 5-10 minutes before trying to scoop it. This will soften it enough for easy scooping.
Can I make this recipe dairy-free?
Yes! You can substitute the heavy cream and whole milk with cashew or oat milk. Just keep in mind that the creaminess might slightly differ, but the raspberry flavor will still shine through!
Print
Raspberry Ice Cream
This Raspberry Ice Cream boasts an irresistible flavor, easy preparation, and key ingredients like fresh raspberries and heavy cream. It’s perfect as a sweet treat for family gatherings or a satisfying dessert any time of the year.
- Total Time: 17 hours
- Yield: 8 servings 1x
Ingredients
- 12 ounces (340 grams) fresh or frozen raspberries
- 3/4 cup (150 grams) granulated sugar
- 1 tablespoon lemon juice
- 1/2 teaspoon vanilla extract
- 2 cups (473 ml) heavy cream, divided
- 1/2 cup (100 grams) granulated sugar
- 4 (72 grams) large egg yolks
- 1/8 teaspoon salt
- 1 teaspoon vanilla extract
- 1/4 cup (60 ml) whole milk
Instructions
- Place a small plate in the freezer before starting to cook.
- In a large saucepan, combine the raspberries, sugar, and lemon juice.
- Heat over medium-high until boiling, stirring frequently. Reduce the heat to maintain a steady boil for 8-10 minutes until thickened.
- To check if it's ready, drop a spoonful onto the cold plate; if it wrinkles when pushed, it's done.
- Stir in the vanilla extract once thickened.
- Remove the saucepan from heat and let cool on a wire rack.
- If not using immediately, transfer the mixture to a clean jar and refrigerate for up to 1 week.
Last Step:
Please leave a rating and comment letting us know how you liked this recipe! This helps our business to thrive and continue providing free, high-quality recipes for you.Notes
The longer you cook the raspberry mixture, the more concentrated the flavor will be.
Ensure to stir frequently during the cooking process to prevent burning.
Store preserves in the refrigerator for future use, if made in advance.
- Prep Time: 20 minutes
- Cook Time: 1000 minutes
- Category: Dessert
- Method: Freezing
- Cuisine: American
Nutrition
- Serving Size: 1/2 cup
- Calories: 290
- Sugar: 24g
- Sodium: 45mg
- Fat: 20g
- Saturated Fat: 10g
- Unsaturated Fat: 8g
- Trans Fat: 0g
- Carbohydrates: 30g
- Fiber: 1g
- Protein: 4g
- Cholesterol: 180mg