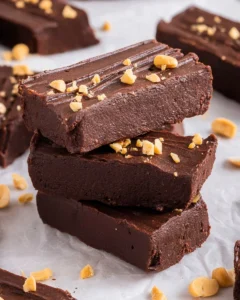
There’s something magical about finding a snack that feels like a treat but is packed with the goodness of protein and healthy ingredients. For me, those moments often happen in the kitchen when I whip up a batch of Brownie Protein Bars. Imagine biting into a rich, chocolatey bar that not only satisfies your sweet tooth but also fuels your day. Perfectly chewy, these bars strike the ideal balance between indulgence and nourishment, ensuring you can treat yourself without the guilt.

I first stumbled upon the concept of Brownie Protein Bars during a late-night snack craving when I wanted something sweet but still healthy. After a little experimentation, I realized how easy it is to create a delightfully chocolaty snack that fits my dietary needs. It’s quick to prepare, requires minimal ingredients, and is sure to become an instant favorite. If you’re looking for a hassle-free, no-bake option that’s both delicious and nutritious, I’m excited for you to try this recipe!
Why You’ll Love This Recipe
- Simple & Quick: With under 10 minutes of prep time, you’ll have scrumptious bars ready to enjoy in no time.
- Irresistible Flavor: Each bar boasts a rich, fudgy flavor thanks to natural peanut butter and cocoa powder.
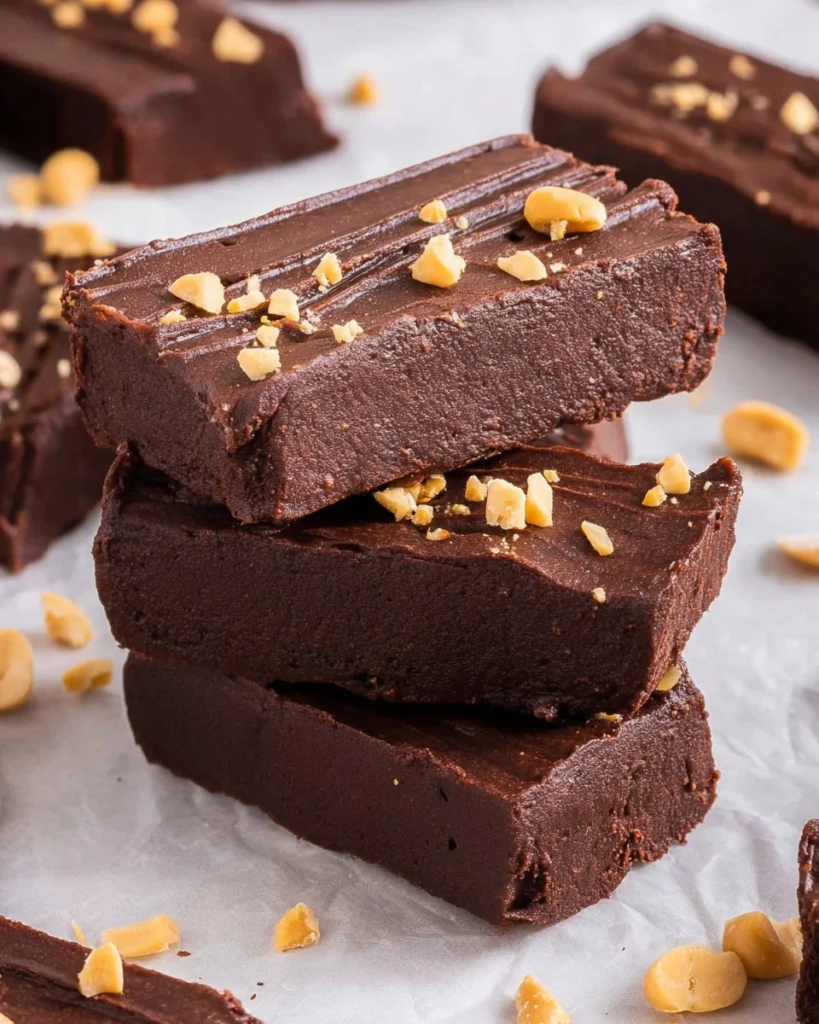
- Eye-Catching Appeal: The drizzle of melted chocolate and sprinkle of chopped peanuts make these bars a feast for the eyes, making you want to share (or not!).
- Flexible Serving: Whether it’s a post-workout snack or a cozy treat with coffee, these bars fit any moment.
- Diet-Friendly Options: They can easily adapt to various diets, being nut butter- and protein powder-friendly.
Ingredients You’ll Need
- 1 cup natural peanut butter (just peanuts and salt): The base of the bars, offering creaminess and protein. You can substitute with almond butter or sunflower seed butter for a different flavor.
- 1/4 cup Dutch-process cocoa powder: This gives the bars a rich chocolate taste without overpowering sweetness. Look for high-quality cocoa for the best flavor.
- 21 to 42 grams vanilla protein powder: Using protein powder ensures these bars pack a nutritious punch. You might explore flavors like chocolate or salted caramel for a fresh twist.
- 2 1/2 to 5 tablespoons maple syrup: Sweetens the bars while offering a touch of maple flavor. Adjust based on your taste preference and sweetness level desired!
- 3 tablespoons chopped semi-sweet chocolate: For a melty finish, this adds delightful little bursts of chocolate throughout the bars.
- 1/2 teaspoon coconut oil: This helps with melting the chocolate, creating a beautiful drizzle over the bars.
- About 2 tablespoons finely chopped peanuts: For a crunchy finish and added texture, they also enhance the peanut flavor.
How to Make Brownie Protein Bars
-
Combine the Ingredients: In a medium mixing bowl, combine the 1 cup natural peanut butter, 1/4 cup Dutch-process cocoa powder, 21 to 42 grams vanilla protein powder, and 2 1/2 to 5 tablespoons maple syrup. Stir with a wooden spoon until thoroughly mixed. If the mixture feels too dry, don’t hesitate to use your hands—it comes together nicely that way!
-
Adjust Consistency: If the mix is too wet, gradually add a little protein powder, mixing until it’s firm enough to hold its shape. This is important for achieving that perfect brownie bar texture!
-
Shape the Mixture: Once your mixture is firm, place it on a piece of parchment paper and shape it into a rectangle of approximately 4”x7”. Pat it down gently but firmly to ensure it sticks together.
-
Melt the Chocolate: In a microwave-safe bowl, melt 3 tablespoons chopped semi-sweet chocolate with 1/2 teaspoon coconut oil at 50% power. Stirging after 30-second intervals until fully melted gives a smooth finish perfect for drizzling.
-
Finish the Bars: Drizzle the melted chocolate over your rectangular shape and sprinkle the 2 tablespoons finely chopped peanuts on top for that extra crunch and flavor.
-
Slice and Store: Cut into 12 bars, and store them in an airtight container at room temperature for up to 3 days or in the refrigerator for up to 1 week. If you’ve dialed up the maple syrup measurements for more sweetness, consider refrigerating them to keep them firm.
Storing & Reheating
To keep your Brownie Protein Bars fresh, store them in an airtight container at room temperature for three days. For longer shelf life, tuck them away in the fridge for up to a week. You can also freeze them for up to 2 months; just let them sit at room temperature for a few minutes before indulging. If they soften, a quick 10-second microwave reheat can restore them to their delightful chewy texture!
Chef’s Helpful Tips
- Avoid overmixing the batter as it may become greasy.
- For a stronger chocolate flavor, use dark chocolate chips in place of semi-sweet.
- Don’t skip the parchment paper when shaping to prevent sticking.
- If your bars crumble, they might need more peanut butter to bind.
- For a fun twist, add a teaspoon of espresso powder to enhance the chocolate flavor.
- Experiment with toppings—perhaps some coconut flakes or a sprinkle of sea salt might elevate your bars!
There’s something special about creating your own snack at home, and these Brownie Protein Bars offer a perfect blend of health and indulgence. You can play with the ingredients to suit your preferences, planning a little variation each time for added excitement. Consider using different nut butters or adding in some dried fruits for natural sweetness!
The beauty of these bars lies not just in their taste but in their versatility. Treat them as a nutritious breakfast or a post-workout boost! So grab your ingredients and look forward to making your snacking routine a bit more delicious. You may just find yourself making these frequently!

Recipe FAQs
Can I make these bars vegan?
Absolutely! To make Brownie Protein Bars vegan, ensure your protein powder is plant-based. You can also substitute the maple syrup with agave syrup if preferred.
What’s the best way to store these bars?
Store the bars in an airtight container at room temperature for up to 3 days. For longer storage, keep them in the fridge for up to a week, or freeze for up to 2 months.
Can I use a different nut butter?
Definitely! While peanut butter gives a classic flavor, almond butter, cashew butter, or even sunflower seed butter can be fantastic alternatives, just ensure they are smooth and creamy.
How can I customize this recipe?
The possibilities are endless! You can add mix-ins like chopped dates, dried fruits, or even protein-packed seeds like chia or flaxseeds for a nutrient boost. Get creative!
Print
Brownie Protein Bars
These Brownie Protein Bars combine the rich flavor of chocolate with the goodness of peanut butter, making a perfect, easy treat for any time. Enjoy a homemade snack that’s both delicious and nutritious!
- Total Time: 0 hours
- Yield: 12 1x
Ingredients
- 1 cup (256 grams) natural peanut butter just peanuts and salt – or another natural nut/seed butter
- 1/4 cup (29 grams) dutch-process cocoa powder
- 21 to 42 grams vanilla protein powder
- 2 1/2 to 5 tablespoons (51–102 grams) maple syrup
- 3 tablespoons chopped semi-sweet chocolate
- 1/2 teaspoon coconut oil
- about 2 tablespoons finely chopped peanuts
Instructions
- To adjust flavor, start with the higher amounts of protein powder and maple syrup for a dessert-like taste, or use lesser amounts for a snack-style bar.
- Combine all ingredients in a medium mixing bowl, using a wooden spoon until well mixed. If too dry, use hands to help combine.
- If too wet, gradually add protein powder until the mixture is firm enough to shape into a rectangle.
- Shape the mixture on parchment paper to create a 4”x7” rectangle.
- Melt chocolate and coconut oil in a microwave-safe bowl at 50% power, stirring every 30 seconds until fully melted.
- Drizzle melted chocolate over the rectangle and sprinkle chopped peanuts on top.
- Cut into bars and store in an airtight container at room temperature for up to 3 days or refrigerate for up to a week, or freeze for up to 2 months.
Last Step:
Please leave a rating and comment letting us know how you liked this recipe! This helps our business to thrive and continue providing free, high-quality recipes for you.Notes
Taste the mixture before shaping and adjust sweetness by mixing in more syrup if desired, but be cautious not to overmix.
Store in the refrigerator if made with the higher amounts of ingredients to maintain firmness.
Let frozen bars sit at room temperature briefly before serving for ideal texture.
- Prep Time: 5 minutes
- Cook Time: NO DATA
- Category: Snack
- Method: No Bake
- Cuisine: American
Nutrition
- Serving Size: 1 bar
- Calories: 200
- Sugar: 5g
- Sodium: 60mg
- Fat: 10g
- Saturated Fat: 2g
- Unsaturated Fat: 8g
- Trans Fat: 0g
- Carbohydrates: 20g
- Fiber: 3g
- Protein: 8g
- Cholesterol: 0mg