Creating Spider Cookies can be such a fun and delicious way to get in the Halloween spirit or just to enjoy a frightfully good treat any time of year. These cookies not only taste great but also look whimsical and a bit creepy, making them a huge hit at parties or festive gatherings. With chewy cookie dough and gooey toppings, they are a delightful combination of flavors and textures. Kids and adults alike will enjoy the process of assembling these little monsters, and trust me, the taste will win over your heart! So grab your apron, and let’s whip up some Spider Cookies that will make everyone at your table smile and perhaps squeal in delight at the sight of these ghastly goodies. Ready to get started? Let’s make some spooky magic happen in the kitchen!
Ingredients
To whip up a batch of Spider Cookies, you’ll need a few key ingredients. These should be easy to find at your local grocery store. Here’s a quick list:
- 1 cup (2 sticks) unsalted butter, softened
- 1 cup granulated sugar
- 1 cup brown sugar, packed
- 2 teaspoons vanilla extract
- 2 large eggs
- 3 cups all-purpose flour
- 1 teaspoon baking soda
- 1 teaspoon salt
- 2 cups chocolate chips (feel free to use a mix of semi-sweet and milk chocolate!)
- 1 cup pretzel sticks (for the spider legs)
- 1 cup candy eyes (you can find these in most baking sections)
- 1 cup chocolate frosting (store-bought or homemade)
Now that you have everything in order, let’s get cooking!
Making the Cookie Dough
Start by preheating your oven to 350°F (175°C). This is an important step, so don’t skip it! While the oven warms up, grab a large mixing bowl and beat the softened butter along with both granulated and brown sugars. You want a light and fluffy texture, which usually takes about 2-3 minutes of mixing.
Once that’s well blended, mix in the vanilla extract and eggs. You wouldn’t believe how much flavor these two simple ingredients bring. Beat until everything is combined.
Now, in another bowl, whisk together the flour, baking soda, and salt. Slowly add this dry mixture into your wet ingredients, making sure everything gets combined evenly. This is where you can add in the chocolate chips—stir gently so they’re well-distributed throughout the dough without breaking them apart.
By this time, your mixture should look deliciously thick and satisfying.

Shaping the Cookies
Next, it’s time to scoop out some dough. Using a cookie scoop or two spoons, portion out the dough into balls about 1.5 inches in diameter. Place these dough balls onto a lined baking sheet, leaving about two inches between each one; they will spread while baking.
Don’t forget, shaping the cookies well now will help your Spider Cookies look extra appealing later. If you’re feeling a bit adventurous, use your fingers to create a slight indentation in the center of each dough ball. This will help them hold their shape after they bake.
Bake your cookies for about 10-12 minutes, or until the edges are golden brown. The centers may still look a bit undercooked—that’s just right! They’ll firm up as they cool.
Cooling and Decorating

Once your cookies are out of the oven, let them cool on the baking sheet for about 5 minutes. This helps them set without falling apart. After that, transfer them to a wire rack to cool completely. This cooling time is crucial; it prevents your icing from melting.
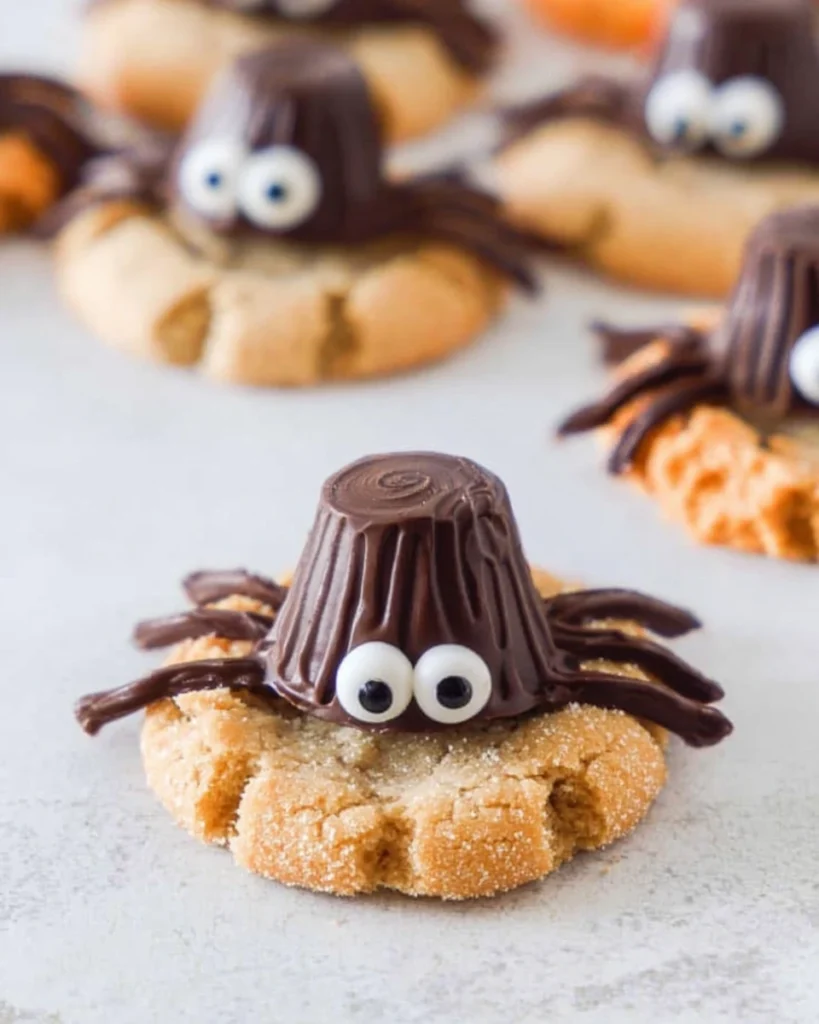
While those cookies cool, you can prepare for the fun part! Grab your chocolate frosting and pretzel sticks. Dip the ends of the pretzel sticks in the frosting, then gently poke four legs into each side of the cookies. Voila! Your spiders are starting to come to life.
Now, let’s add those candy eyes! You can put a generous dollop of frosting on each cookie where you want to place the eyes. Gently press the candy eyes into the icing, positioning them however you’d like. Your Spider Cookies are now turning into creepy crawlers!
Storing Your Spider Cookies
Wondering how to keep these tasty treats fresh? There are a few options! Store your Spider Cookies in an airtight container at room temperature. They should stay yummy for about 3-5 days. If you want them to last a bit longer, consider refrigerating them, especially if you’ve used homemade frosting.
If you end up with extras, you can try freezing them. Just ensure they’re in an airtight container or freezer bag to prevent freezer burn. They can be frozen for up to three months! Just let them thaw at room temperature before digging in again.

Final Thoughts
Spider Cookies are more than just a recipe; they’re a way to bring some festive fun into your kitchen while providing a treat that everyone loves. Whether you’re preparing for Halloween or just want a creative snack, these spiders are a fantastic choice.
Remember, don’t stress about perfection. The beauty is in the creativity! And when you serve them, watch the joy on your friends’ and family’s faces as they discover these frightfully delicious cookies. Enjoy your baking time, and may your Spider Cookies be a sweet success!
Print
Spider Cookies
Spider Cookies are a delightful treat, perfect for any festive occasion. With chewy dough and whimsical toppings, they bring joy to both kids and adults!
- Total Time: 32 minutes
- Yield: 24 cookies 1x
Ingredients
- 1 cup (2 sticks) unsalted butter, softened
- 1 cup granulated sugar
- 1 cup brown sugar, packed
- 2 teaspoons vanilla extract
- 2 large eggs
- 3 cups all-purpose flour
- 1 teaspoon baking soda
- 1 teaspoon salt
- 2 cups chocolate chips
- 1 cup pretzel sticks
- 1 cup candy eyes
- 1 cup chocolate frosting
Instructions
- Preheat oven to 350°F (175°C).
- Beat softened butter with granulated and brown sugars until light and fluffy.
- Mix in vanilla extract and eggs until combined.
- In another bowl, whisk together flour, baking soda, and salt, then add to wet ingredients and combine.
- Gently fold in chocolate chips.
- Scoop dough into balls and place on baking sheet, spacing two inches apart.
- Bake for 10-12 minutes until edges are golden.
- Cool on baking sheet for 5 minutes, then transfer to wire rack.
- Decorate with chocolate frosting, pretzel legs, and candy eyes.
Last Step:
Please leave a rating and comment letting us know how you liked this recipe! This helps our business to thrive and continue providing free, high-quality recipes for you.Notes
Let cookies cool completely before decorating to prevent frosting from melting.
Store in an airtight container at room temperature for 3-5 days.
Cookies can be frozen for up to three months.
- Prep Time: 20 minutes
- Cook Time: 12 minutes
- Category: Dessert
- Method: Baking
- Cuisine: American
Nutrition
- Calories: 180
- Sugar: 12
- Sodium: 150
- Fat: 8
- Saturated Fat: 4
- Unsaturated Fat: 3
- Trans Fat: 0
- Carbohydrates: 26
- Fiber: 1
- Protein: 2
- Cholesterol: 30